Excel4GroupShare
By Trados AppStore Team
Free
Description
Note: This application is no longer maintained or supported. You may find the GroupShare PowerShell Toolkit of interest.
The solution
Expend your reporting possibilities by exporting your GroupShare data to Excel. This application adds a new group to Microsoft Excel allowing you to pull data from a GroupShare instance. The application can be used by anyone with a login but the only data available to you will be based on your GroupShare login credentials.
A great tool for administrators as it gives you a unique look into your database aiding you in your daily administrative tasks. It's also a great tool for project managers as you can use the power of Excel reporting to view the status of your projects in any way you like.
Technical details
2.0.0.3 - Trados Studio (2024, 2022)
Changelog:
- updated dependencies
Checksum: ceaff4bc7add937bf31cd0ebeab823e56d537c440b1df2d4a2aa943c1d39d140
Release date: 2022-07-01
1.0.3.0 - Trados Studio 2021
Changelog:
- Added new 'logging' feature
Checksum: a8118b39bfddaaaf4c2178972cbe63fede0a0c868031d3a46c52d2dd69d14562
Release date: 2020-08-28
Support website: https://community.rws.com/product-groups/trados-portfolio/rws-appstore/f/rws-appstore
Shared products:
Trados Studio (2024, 2022)
2.0.0.3
- updated dependencies
Trados Studio 2021
1.0.3.0
- Added new 'logging' feature
Introduction
The Excel for GroupShare application is a small add-in for Microsoft Excel that supports the ability to connect to a GroupShare instance and download raw data that can be used to create your own reports. The data is downloaded in a very raw form to try and ensure that you can maximise the range of reports it's possible to create. You are only limited by your imagination and your ability to work with Excel. A couple of important notes on this:
Key Features
- you can connect to GroupShare 2017 or 2020
- the data available to you will be restricted by your permissions on the GroupShare server
Installation
When you visit the SDL AppStore to download the application it will be downloaded as a zip file. You should unzip the file to somewhere on your computer before running the installer as running it within the zip can cause problems for some users.
NOTE: If you have a previous version of the application installed you should uninstall it through Add/Remove Programs in Windows before attempting to install a new version.
Once you have unzipped the file you will find a folder with three entries:

To install you simply run the "setup.exe" file which will deliver a dialogue like this:
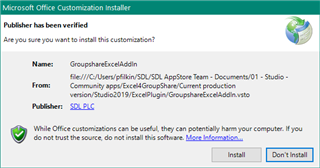
Click on Install and the application installation process will be completed in a few seconds:
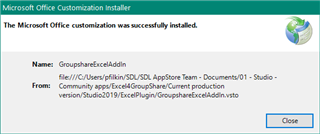
Click on close and now you should be able to find the GroupShare toolbar in Excel like this:

Getting Started...
The first thing to do is click on Login so you have access to your GroupShare instance:
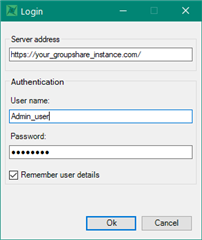
Once you are successfully logged in you'll have access to the other menu items. If you click on the other items before logging in you'll simply be taken to the same login screen first.
What can you download?
Once you're logged in you have three options in the Excel ribbon:

Get Project Data
This feature will pull data held on your GroupShare projects and offers similar filtering to that available in GroupShare to narrow down the data being pulled. This is important because the volume of data available is significantly higher than that available through the conventional reporting in GroupShare itself and te more you attempt to download the longer it will take. So the more options you select, the more data you will get, the more cups of coffee you're going to need!
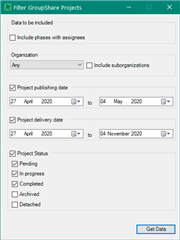
However, once you do have the data downloaded you'll see the amount of data available to you is significant. To initiate the download select your options and click on Get Data. You'l see something like this:
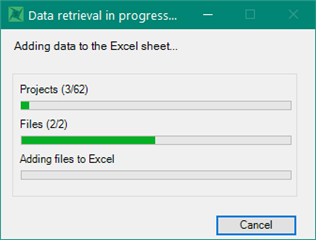
You can cancel the download at any time and the operation will stop, leaving you with only the data that was downloaded by the time you clicked cancel. With all the options checked you can expect to see data in columns relating to the following:
- Organisation
- Project Name
- Created at (date)
- Delivery Date
- Client
- Project Language Pairs
- Project Status
- Project Description
- File Status
- File Name
- File Type
- File Size (bytes)
- File Role (source/translatable/reference)
- File Language Code
- File Check In By (user name)
- File Check Out To (user name)
- File Last Check In Date
- File Last Check Out Date
- File Last Modified Date
- File Approved SignOff Words
- File Approved Translation Words
- File Draft Words
- File Rejected SignOff Words
- File Rejected Translation Words
- File Total Words
- File Translated Words
- File Unspecified Words
- File Type Percent Complete
- Assignees Names
- Assignees Roles
- Assignees Emails
- Current Phase (phase name)
- Preparation (user name)
- Translation (user name)
- Review (user name)
- Finalisation (user name)
Get Resources
This option offers various types of resource related data:
- Translation Memories
- Language Resource Templates
- Field Templates
- Termbases
- Project Templates
- Custom Fields
Translation Memories
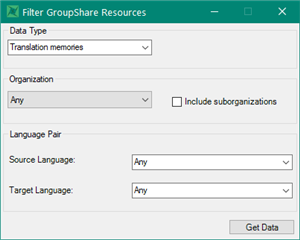
This download will provide the following columns of data:
- Translation Memory Name
- Translation Memory Language Direction
- Number of Translation Units
- Translation Memory Description
- Translation Memory Location
- Translation Memory Creation Date
- Translation Memory Tokenizer Flags
- Translation Memory WordCount Flags
- Translation Memory Last Recomputed Date
- Translation Memory Last Recomputed Size
- Translation Memory Fuzzy Indexes
- Last Reindex Date
- Last Reindex Size
- Should Recompute Statistics
Language Resource Templates
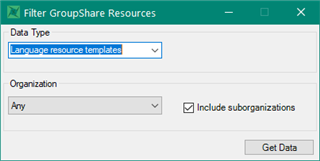
This download will provide the following columns of data:
- Name
- Location
- Description
- Language Resource Template ID (guid)
- Owner ID (guid)
- Is TM Specific
- Language Resources (identifies what has changed from default)
Field Templates
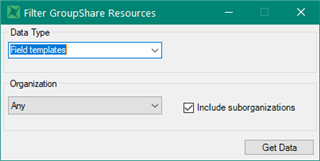
This download will provide the following columns of data:
- Name
- Location
- Description
- Field template ID (guid)
- Owner ID (guid)
- TM Specific
- Fields (type of field and values used)
Termbases
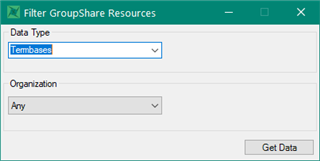
This download will provide the following columns of data:
- Name
- Id (guid)
- Description
- Parent Organization (where the termbase was created)
- Linked Organization (where the termbase is used)
Project Templates
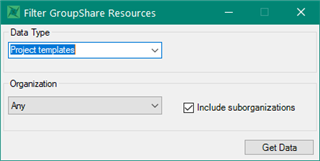
This download will provide the following columns of data:
- Name
- ID (guid)
- Description
- Organization
Custom Fields
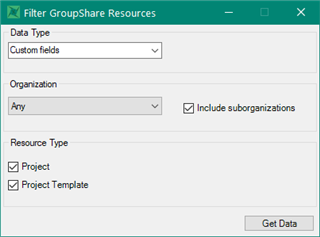
This download will provide the following columns of data:
- Name
- Description
- Resource Type
- Default Value
- Read Only
- Organization
Get User Data
This option will pull user data from the server:
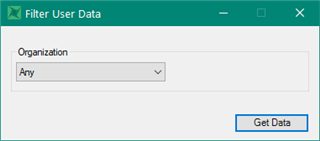
Data retrieval box is a little different:
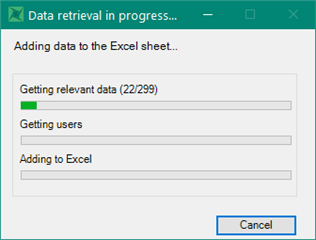
Once downloaded you will have access to the following columns of data:
- User Name
- User Email
- Description
- Phone Number
- Role
- Project (role related)
- Organization
Excel Tips for Reporting
The raw data pulled from GroupShare has been designed to make it possible to create complex reports in as many ways as possible. This means there is a trade-off between how much granularity we wanted and how much skill you need in using Excel to get what you need. It also means a huge trade-off in terms of the time it takes to download data since the application is doing some very complex lookups between tables to pull the data in a way that makes it accessible for reporting.
Simple Reporting
For very simple reports you can of course use the filtering capabilities in Excel under the Home ribbon:
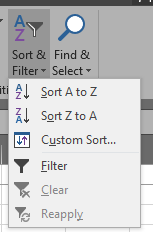
You can also add columns for your own calculations, and these can often be helpful to improve the more complex reporting by manipulating the data tables in Excel before creating your reports. It can take some thought to report accurately on what you need and to ensure you are not duplicating or omitting details. A good check is always to look in GroupShare and make sure you have the simple stuff right, such as number of organisations, or projects, as a cross check.
Detail Reporting
For detailed reporting your best bet is to use a Pivot Table. If you have not used these before here's a couple of useful tips.
Add to your Quick Access bar in Excel
This make it far easier and faster to access the menu item needed. First of all access the More Commands menu...:
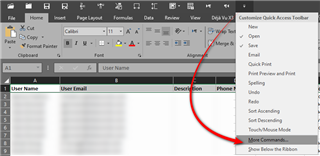
Select All Commands from the drop down and then Add>> using the add button the PivotChart & PivotTable to your list of commands that will be displayed in the Quick Access Toolbar:
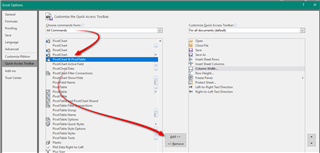
Now you can select all the data from your downloaded worksheet and start the Pivot creation process in one-click:
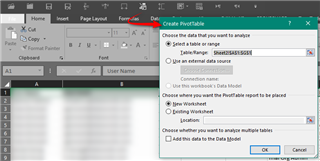
It's also worth noting that you probably need to check this option which is not selected by detail:

This is because it adds an additional value called Distinct Count to your choice when setting the Values field in your pivot. Without this you don't have this option and the results of yor reports may contain duplicate counts depending on how you compiled your report:
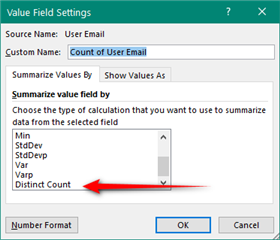
Pivot tables work by allowing you to drag and drop the fields you want from the field list at the top (essentially the column headings from your download) into the four different areas at the bottom:

You can manipulate this as much as you like and you'll soon get the idea of how useful this can be as you see the tables and charts being drawn automagically in front of you. Some good resources would be:
https://www.excel-easy.com/data-analysis/pivot-tables.html


